
My Mini Album Journey

Do you believe it .. either do I ... I am actually finally doing a forever and a day promised 100 times over a tutorial on how I make my mini albums page by page by page ..
What you need :
5 - 6x6 Chipboard pieces
Paint
Scrapbook Papers ( for this tutorial I am using Prima Divine - and I have on hand 2- 6x6 pads and 2 each of the 2 x12 papers)
Cardstock - I have 5 12 x 12 sheets of the same color - ( I am using tim holtz broken china distress cardstock by co-ordinations)
Embellishments
Glue - I am using Beacon, Glue Gun and Glue stick
Day One :
Paint the edges ( both sides) of the chipboard in a matching color of your papers. Make sure to get the edges.. preparation is everything !


Page One:(Inside Cover)
We are doing our first flip insert :
Cut Cardstock 51/2" x 12" and score at 3" and 8 1/2" fold and lets embellish - weeeeeee

The cover can have flowers and embellishments since we have 1/2 inch space ( but not too much because we have page 2 to do as well )
This picture is page one closed *Note* Do not glue anything down until the page/insert is completely embellished and done .. its so much easier to work with and if you make a mistake well .. easier to correct and do not throw out any piece of paper until you are 100% done the mini ... use those tiny pieces of paper to punch out flowers, embellish a tag, etc ...
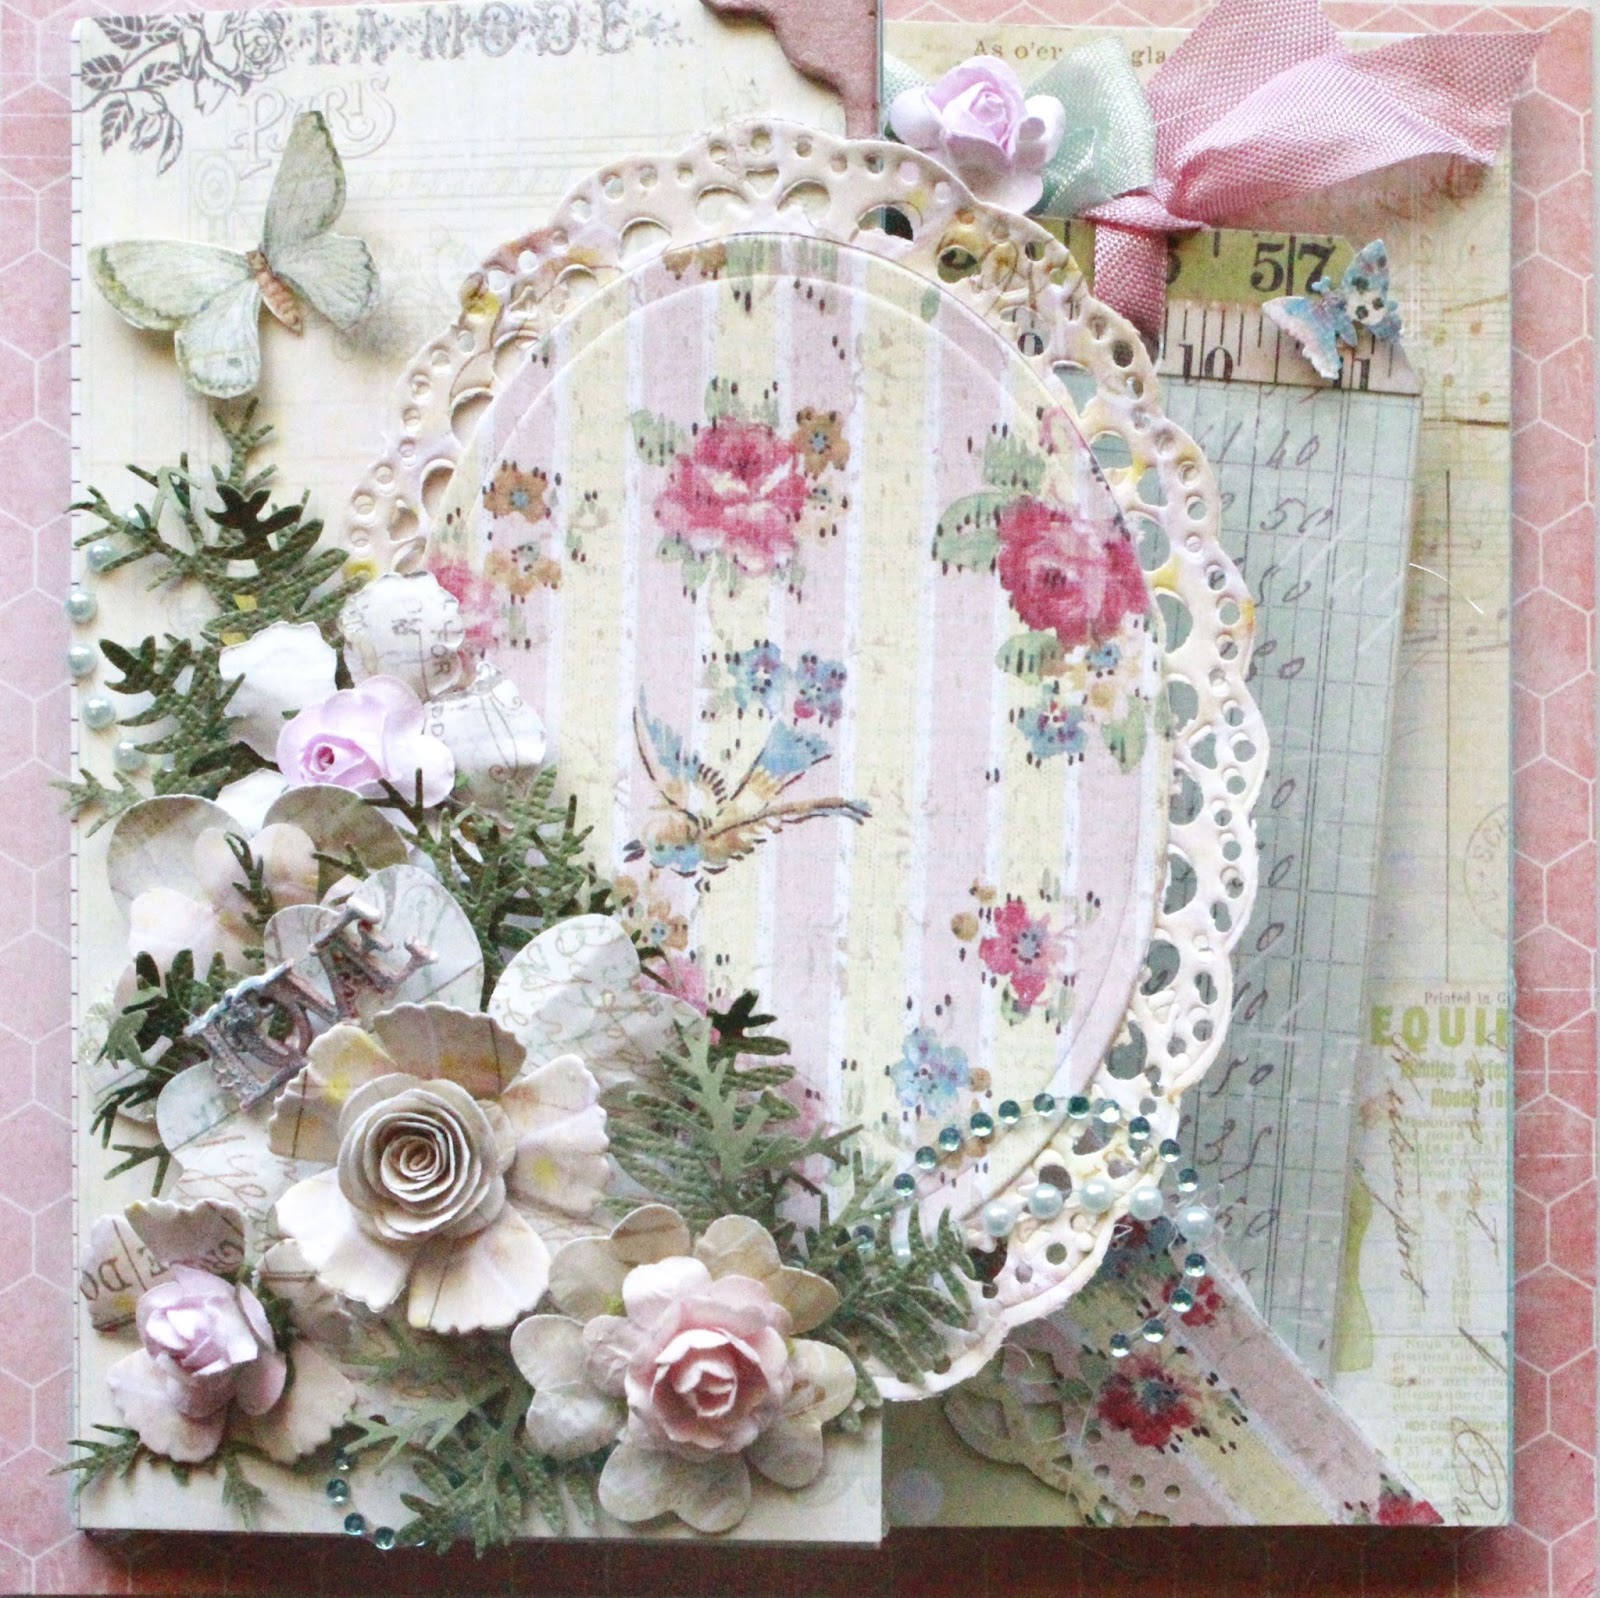


So opened : this is what it looks like open :

Off to make page 2 ....
***
Day Two: Right hand side of page
Another flip insert on the right hand side-
Cut the cardstock 5 1/2" x 12" and score at 4" and 10" - Fold into little book and embellish
Since I used lots of flowers on the left hand side and have little room for flowers - by layering the papers and making lots of hidden pocket tags is a great way to achieve an embellished effect.

Above: right had side of the page closed
The next three pictures are the inside of the "flip" from left to right :


The right has a little extra flip - since it is only 2" wide - a place for a photo and journaling was added by allowing a portion to flip down


The complete inside :

A glimpse at some of the tags - and in total page 2 of the mini can hold 11 pictures with lots of room for journaling .

Day three - working on it ...
----------------------------------------------------------------------------------------
Page Three
A quick tutorial on page 3 flips ( looking at the pics should help just in case )

Page Three closed


Inside flip of the 4 1/2 " flip

Left Side 51/2 inch front flip

Inside of the 5 1/2" flip


Opened completely - this is what it looks like

Page FOUR AND KIND OF DAY 4 ....

The above page consists of 4 tags for extra pictures/journaling.

Page 5 awaits
PAGE FIVE - AND CLOSE ENOUGH TO DAY FIVE
And the mini album continues - and yup another flip page !
Cut your cardstock to 5 1/2 x 12 and then score at 5" and 10" and fold so you have this :

The 2" portion is the bottom - so it flips up - time to embellish by layering the papers and placing lots of tags to get the "full effect"

This is the flip closed - I used ribbon to secure the bottom portion

The "top of the flip - ( lots of tags )

Middle inside page

2" inside bottom - writing paper from the divine collection so that one can write a title, a quote, special words, a date etc,,

Opened this is what it looks like ...
Yup off to work on page 6 - we are almost done
PAGE 6
You guessed it - another flip - put this one is an easy one-
Cut a piece of cardstock 4.5" x 5" and score at 4.75 and 4.85 - so you have a little binding and enough of a flap to glue on the underside of the paper.
Yup - time to decorate the outside and the inside of your flip
This is how it looks closed - then open the flip :


So if the flip was open this is what it would look like :

Glue the flip on the back side of your 6x6 paper ( mine was glued on the green and polka dot paper and a little trim -just becuase

page 7 is just around the corner!
PAGE 7 - SECOND LAST PAGE and lets pretend - day 7 ...
Are you excited - we are almost done ... just page 8 left and the cover - so lets begin on page 7 and you know it a flip !
Cut two sheets of cardstock 5" x 12" and score both at 3.5" and 8.5" - Now one of the sheets trim one less than a 1/8" so that when you stack and fold it - its fold nicely - glue the smaller one on top of the larger one so the flaps fold up and down and the larger full 5" width the ones the flaps fold right to left . The pictures should help you .

Okay time to decorate - now you will have to use a closure - I was trying to use a magnet but there were issues so I went with ribbon instead and this is how the page looks closed .

I left the tags off the picture in order to help you visualize better when its semi open


the rest are the inside - with no tags yet - I have very few small pieces and I am already using the 2nd 6x6 paper pack so I will come back to make tags out of the scrap and tiny pieces of paper I have left from creating this page and page 8 .


We are almost there - page 8 is on its way !
LAST PAGE
PAGE 8 - this is it-less the cover and binding
This is the last page and no flip...

The page without the tags :


Okay the cover time now - this is the hardest for me
THE COVER ... WE ARE DONE!


