Pages

Showing posts with label Creative Imagination. Show all posts

Monday, December 3

Ode to Yesteryear - December Kit of the Month


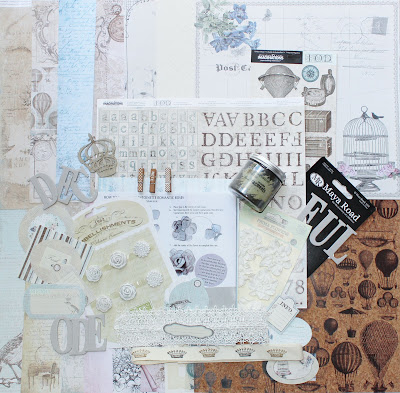
As 2012 comes to a close, we ponder with smiles and sometimes with tears the year gone by. We remember our time away whether a family vacation or in our  thoughts and dreams.Photographs of  that special occasion have captured a moment  that will live forever in the  heart and mind. Cherished moments, loved memories is  why we bring to you today Ode to Yesteryear.


We could not let Christmas pas s us  by and  our  off the page  project that is included in this months  Kit of the Month is The Teresa Collins Christmas Countdown Memory Mini Album. 


Though the kit is filled with lots of inspirational  goodies, we have put together add ons that compliment the main kit 


Build a Page
 This month we are so excited to share with you Kelly's BAP that will give you step by step instructions to create this  incredible layout on December 4th 2012 on the forums ! 


You Tube  Tutorial

 In the main Kit of The  Month we have enclosed as 12x12 Corkboard in order to  get your  creative mind thinking of the possibilities. We present  you with an Inspiration  Video Tutorial by Shona giving you step by step instructions on making this incredible Cork layout ! 


Thursday, November 29

Rejoice


I have to admit IOD Collection  by Creative Imagination for the  past few years have been  my favorite  Christmas Collection Papers!  An  easy  Christmas Card using their  papers and  Die Cuts . 
Do not  forget  we are running a 20%  off till 11.30.2012   all Christmas  papers on sale  so  get  some while you can  ...  great for  cards, tags,  layouts and  altering  .. this is  a 2012  must have  collection ! 

Tuesday, November 27

Double the Cards Tutorial

Are you ready to make some cards with  me? Two cards, Four sheets of double sided patterned paper  and  two cards in less than an hour ! These are the cards I made using  CI Rejoice and Glitz Design Joyeux Noel Collection ....  


Lets begin : 

I chose two clip art images from the CI  Rejoice  Collection  - Joy Carols-29814  and used my spellbinder die to cut them into an oval shape. (large ovals S4-110) 
Use  what you have, a template a die, cut the image in a circle or oval form - You need to add  a touch of different so do not leave them in  rectangular form. Put them aside. 


Choose a sheet of double sided patterned paper and  cut  it 10"x10"  - ( DO not throw out the  2" strips we will be using them ) and then cut in half leaving you with two 5" x 10"  and  score and  fold  one  one  way and the  other the  other way ....so  now you have  your card base ...  


Choose your next sheet of paper and cut 2 squares 4.5" x 4.5"- Once again use one side on one card and the other side on the other 

I do not  glue anything down till I have layered and  looked at the finished design product 

From the same sheet of  paper cut  2 -3 x 4 pieces and place them on the cards 


Place one towards the top left hand side and on the other card place closer to the bottom of the right hand side

Next  choose one more double sided patterned paper- and cut 2 - 3x4 and place them on the card  lengthwise


This is why I do not glue till the very end .. Take  those extra strip of  paper you have  from cutting  and cut them in one inch lengths- use  2, 3 4  border punches and start punching and placing them behind the sheets . 


Place the  clipart  piece on top  of  each card and  make any  alterations  ... add some more punching borders, distress the  edges or  ink the edges which I did. using Ingvild Bolme  Chalk Ink ( Dark Bark)  When you are  happy  glue  from the  top down  ... 
The  more  fun part -  Layering the flowers and embellishments!

Start with your largest  flower : 
 Then place your medium flower just  underneath it 
 Then place a third  flower  smaller than the first two so that you have  created a triangle shape
Add  2  more  flowers  then two more  .. once at  7 flowers than you can  add one at a  time and  other  embellishments  to give you that cluster ...  


Remember  One  more time  -  Start with a large, medium and small flower and make a  triangle  .. no flower on your  project  should be larger than the first one  you place in the corner! 


You are done!